How to Create an Online Memorial, Step by Step

An online memorial is a single page about one person: their name and dates, the story of their life, a few photographs, the place where they rest, and the words family and friends leave for them. It doesn't replace a funeral or a grave. It gives everyone who loved them — wherever they live — one place to come back to.
This guide walks through making one on Pure Memorial. It takes about ten minutes to start, and you can keep adding to it for as long as you like.
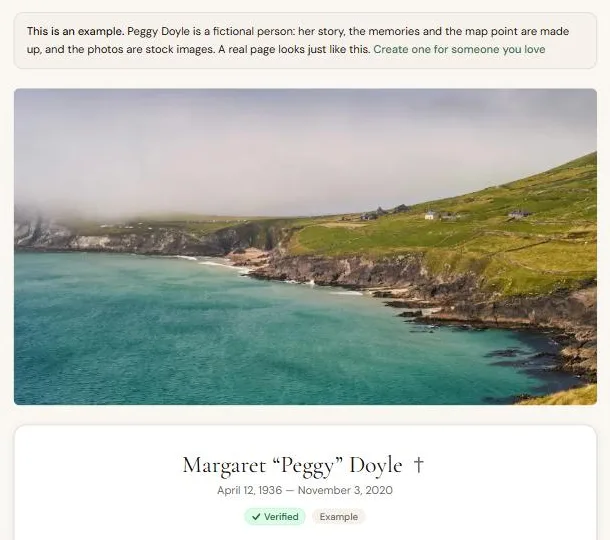
The finished page looks like this. See the whole example — the person is fictional.
Before you start
You need only one thing to begin:
- Their full name, as family would recognise it. You can include a nickname in quotes, like Margaret "Peggy" Doyle.
Everything else is optional and can wait. If you have them to hand, it helps to gather:
- the dates of birth and death: the exact day, only the year, or nothing yet;
- three or four photos you'd like to share (a portrait isn't required — places and objects work beautifully too);
- the cemetery's name or address;
- a scan or phone photo of the death certificate, if you'd like the page verified and in search engines (more on that below).
Step 1. Create an account
Sign up with your e-mail address. The Free plan includes one memorial with up to ten photos, and no card is needed.
Step 2. Fill in who they were
The form has four short sections.
Identity. Their full name is the only required field. Add the dates of birth and death if you know them: the exact day, only the year, or I'll add it later. The exact date of death is needed only to verify the page with a death certificate. You can also choose a faith tradition — the page then shows its symbol next to their name, and in place of a portrait when there's no photo. Leave it as Not specified if you prefer.
Biography. A few sentences are enough to start. Many people find it easier to write a short version now and come back to it after talking with family. If you're stuck, our guide on what to write on a memorial page has a simple structure and examples.
Resting place. Search for the cemetery or address, or click the map to drop a pin, and drag it to the exact spot. Visitors will see the map and buttons that open directions in Google Maps or Apple Maps. If there's no grave — after cremation or a scattering, or when the place is unknown — tick No physical burial location and the page won't show a map. More in how to share a grave location with relatives.
Photos. Add photos now or later; the first becomes the cover. Some families prefer a memorial without pictures of the person, as many Muslim families do — tick No photos on this memorial and no photos will appear anywhere, including in the preview when the link is shared.
Step 3. Choose who can see it
There are three levels, and you can change them at any time:
- Unlisted — anyone with the link can open the page; it stays out of search engines. New pages start here.
- Public — anyone can open it, and once it's verified it can appear in search results.
- Private — only you can open it, which is useful while you're still writing.
Remember that a link can be forwarded. If a page should stay within the family, keep it Unlisted and share the link carefully. Our guide to public, unlisted and private memorials explains the differences in detail.
Press Create memorial and the page is live.
Step 4. Share it with family
Copy the link and send it any way you like — messengers show it with a card bearing their name and photo. You can also invite relatives by e-mail, with a personal note, right from the page.
People who receive the link can see the photos, find the grave on the map, and leave a memory of their own. They don't need an account: they write their name and, if they like, how they knew the person. Every memory is checked before it appears, and as the page's creator you can remove any of them or turn memories off.
Step 5. Verify it, if you want
Your page works fully without a certificate. Verifying it adds the Verified badge and lets a public page appear in search engines, so people can find it by the person's name.
Upload a photo or scan of the death certificate from your dashboard. It's checked automatically against the page, usually within a few minutes; if anything is in doubt, a person on our team looks at it. The certificate is kept in private storage and is never shown on the page.
Verification makes sure no one can show a memorial for a living person in search engines, and lets visitors see that the page has been checked.
Keep adding to it
A memorial page is never really finished. Family will remember stories you'd forgotten, find photographs in old albums, and want to add a few words on anniversaries. You can edit everything at any time, and download all of it in one file whenever you want a copy.